How to winterize an outdoor tap in Calgary (including the bleeder valve step everyone skips)
Written for Calgary homeowners · Last reviewed August 22, 2026
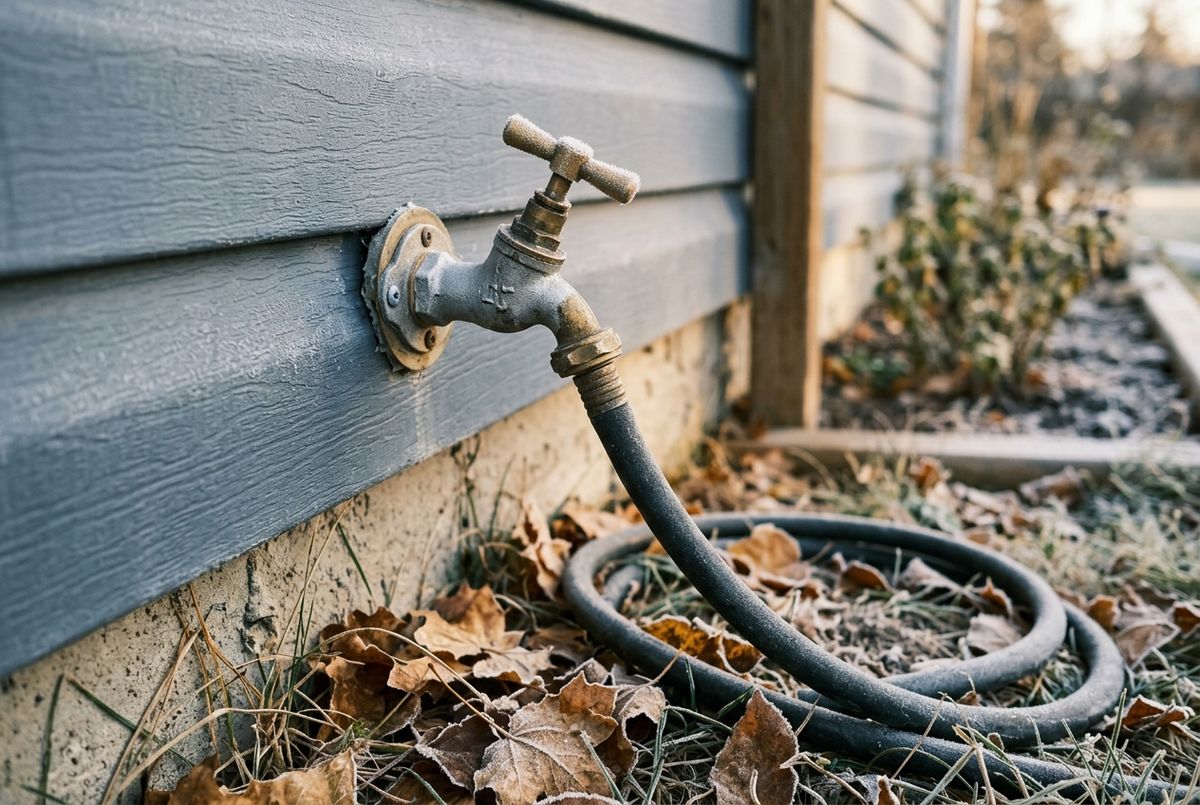
Short answer: Yes, you need to drain it, and there are five steps — not two. Close the interior shut-off valve for the outdoor line, go outside and open the outdoor tap fully, come back in and open the small bleeder cap on that interior valve to let the trapped water out, leave the outdoor tap open all winter, and take the hose off. Skipping the bleeder is the mistake that bursts pipes in this city: the water left between the interior valve and the spout has nowhere to escape when it freezes and expands.
Ten minutes, no parts, no skill required, and it prevents one of the most common and most expensive winter failures in Calgary homes. Best done in early October, not late November — more on that below.
The sequence, in order, with the reason for each step
Every step exists because of the one before it. Out of order, and you leave water where it can freeze.
- Find the interior shut-off for the outdoor line. A small valve on the pipe feeding the hose bib, usually in the basement joist bay directly behind the tap. Round-handled gate valve or lever-handled ball valve, with a small brass cap or thumbscrew on its side — that cap is the bleeder. Two outdoor taps means two valves. Some houses have none, which changes things — see below.
- Close that valve. Clockwise on a round handle until it stops firmly, or a quarter turn on a lever so it sits crosswise to the pipe. That isolates the outdoor section from your heated household plumbing, so only the short outdoor run is exposed.
- Go outside and open the outdoor tap fully. Take the hose off first. That gives the trapped water an exit at the far end and lets air in behind it. Some water will run out — that's the point. Without this, step four has nothing to drain.
- Go back inside and open the bleeder. Cup or rag underneath, unscrew the little cap or thumbscrew on the side of the interior valve, let the water drain. This is the step almost everyone skips, and the water it releases is sitting in the worst possible place — the stretch running through the cold rim joist and exterior wall. Let it dribble until it stops, then leave the cap loose for the winter so any residual drop can escape.
- Leave the outdoor tap open until spring. An open spout means water that finds its way in can drain out and any ice can expand outward rather than against a closed valve. Closing it in December because it looks untidy undoes the whole job. Reopening in spring has its own short sequence, further down this page.
Don't force a stuck valve. An interior shut-off that hasn't moved in fifteen years can seize, or start weeping at the packing when you turn it — old gate valves in Calgary basements do this routinely, and scale off our famously hard water is part of why. Snug it as far as it goes comfortably, don't lean on it with a wrench, and if it won't close or drips at the stem, that's a small planned repair now instead of an emergency later.
Frost-free sillcock or standard hose bib? How to tell
Two very different fittings, and knowing which one you have changes what winterizing means.
| Standard hose bib | Frost-free (frost-proof) sillcock | |
|---|---|---|
| How it works | The valve seat is right behind the handle, at the outside wall | A long stem runs back through the wall so the valve seat closes 15–30 cm inside the heated space |
| What you see outside | Short body against the siding | Identical from outside — you cannot tell by looking |
| How to actually tell | Interior pipe joins the tap right at the wall | From inside, 15–30 cm of tube runs through the wall before the connection |
| Handle feel | Shuts off instantly, right at your hand | Slight delay between turning and the flow stopping — the seat is the length of the stem away |
| Does it still need draining? | Absolutely. It holds water in the exterior wall by design | It's designed to self-drain — but see the hose warning below |
Older Calgary homes — pre-1960 inner-city stock and plenty of 1970s and 1980s suburban builds — typically have standard bibs with an interior shut-off and bleeder. Newer builds, and any tap that's been replaced, usually have a frost-free sillcock. Plenty of houses have one of each.
A frost-free sillcock still bursts if you leave the hose on
The most important line on this page for anyone with a newer tap. A frost-free unit drains itself: shut it off and the water in the long stem runs out through the spout by gravity. A hose left attached blocks that path, so the stem can't empty, the water stays in the tube inside your wall, and the copper splits. The unit did nothing wrong; it just couldn't drain.
So the rule is the same for both types: the hose comes off in the fall, every year, no exceptions. The City's own frozen pipe guidance puts it first: make sure the water line to outside faucets and garden hoses is turned off, disconnected and drained. It sits alongside the City's other winter measures: a thermostat set to at least 15 °C, and UL-listed heat tape or cable if you insulate exposed pipe.
Source: The City of Calgary — Protect your water lines and meter from freezing (checked August 2026)
The other frost-free failure: it was never installed on a slope
For a frost-free sillcock to drain, it has to sit with a slight downward pitch to the outside — a couple of degrees is enough. Fitted dead level, or tipped back into the house because that's how the hole through the rim joist lined up, it holds a permanent pool of water in the stem. It works fine for years, then splits in a hard cold snap, and the homeowner concludes frost-free products are a scam. They aren't; that one was installed wrong. If you can see the interior stem, sight along it — level or worse means treat it like a standard bib and bleed it every fall.
Why you find out in April, not January
The Calgary pattern is consistent. The pipe splits in January inside the exterior wall, and nothing happens — the interior valve is closed, the split section is dry and full of ice, so you forget about it. In May you go to wash the car, open the interior valve, turn the tap on, and water pours into the basement or the wall cavity.
Which is why the first spring use should be deliberate. Close the outdoor tap, snug the bleeder cap, then open the interior valve slowly with someone standing outside, and watch the interior pipe with a flashlight while the water runs. A spray, a drip at a joint or a suspicious bulge in the copper means shut it straight back off. Do that when you have half an hour, not when the kids are waiting with the sprinkler.
If it does let go, the response is the same as any other burst: main shut-off, power off to the wet area, photograph everything before you clean up. We've written that out step by step on our frozen and burst pipe page, and the rest of the winter list lives on the main Calgary plumbing guide.
Do it in October, not November
People wait for winter to feel like it's arriving, which in Calgary is a bad bet. A hard overnight freeze in the first half of October, while the days are still pleasant, is enough on its own — the exterior wall cavity gets colder than the air outside and the pipe holds no heat.
So tie it to something you already do: the day you drain the hose and hang it in the garage is the day. Hose off, interior valve closed, tap open, bleeder open, irrigation blown out the same week. If the tap is on a garage wall, the pipe feeding it runs through unheated space for its whole length, which makes garage walls one of the most reliable freeze locations in this city. The same cold snap starts the other failure homeowners get caught by — a frozen sewer line, which shows up as slow drains rather than a burst.
- Both taps, hoses off. Front and back. It's always the one round the side that gets forgotten.
- Splitter and timer off too. A brass Y-splitter holds water, cracks, and blocks a frost-free unit from draining.
- Check the garage tap. Same cold, less attention.
- Label the interior valve. A bit of tape on the joist. Next October's version of you will be grateful.
What if there's no interior shut-off at all?
Some houses genuinely don't — a tap teed straight off a household line, no isolating valve, no bleeder. If that's you and it's a standard hose bib, there's no safe way to winterize it: you can't isolate or drain the outdoor section. Adding an interior shut-off with a bleeder, or swapping the bib for a properly pitched frost-free sillcock, turns that tap from an annual gamble into a non-issue — both short jobs in September rather than emergencies in February.
It doesn't need a permit, either. As of August 2026 the City requires one when a plumbing system is constructed, extended or altered, but not to repair a leak in a water distribution or drainage system, and not to replace existing faucets and fixtures — a like-for-like hose bib swap sits on the no-permit side. Add a new outdoor tap where none existed and that's an extension, so the answer changes. Our permits and DIY rules page has the full list, including what a homeowner's permit costs and why that number moves every January.
Source: The City of Calgary — Homeowner electrical and plumbing permits (checked August 2026)
Repair or replace — and what drives the cost
Not every leaking outdoor tap needs replacing. Match the symptom to the fix before anyone quotes you — and remember a tap that drips all summer is metered water you're paying for, which is the same arithmetic we run on the high water bill page.
| Symptom | Usually means | Usual fix |
|---|---|---|
| Drips from the spout when closed | Worn washer or seat | Washer/stem repair — cheap, small |
| Water weeps around the handle when open | Packing nut or stem packing | Tighten or repack the stem |
| Handle spins with no effect | Stripped stem or broken internals | Stem cartridge, or replacement if parts aren't available |
| Water appears inside the wall or basement when the tap is on | Split pipe or split sillcock stem — the freeze damage | Replacement, and access to the pipe inside the wall |
| Tap is solid but there's no interior valve | Nothing failed; you can't winterize it | Add an interior shut-off with bleeder |
We're not publishing a dollar figure for a hose bib replacement in Calgary, because we couldn't verify one from a source we'd stand behind and a made-up number is worse than none. What drives the price: whether the interior pipe is reachable from an unfinished basement ceiling or sits behind drywall; whether the pipe behind it split too; whether an interior shut-off has to be added; and whether you're calling in October or on a Sunday in February. Hourly rates, and why almost no published figure here is authoritative, are on our plumber cost page.
Tap already dripping into the wall?
Send a photo of the pipe from the inside and you'll get a straight read on whether it's a five-dollar washer or a split line behind the drywall — so you know what you're dealing with before anyone books a visit. Free, like everything on this site.
Questions Calgary homeowners actually ask
Do I really need to drain the outdoor tap, or is turning it off enough?
Turning it off is not enough, and this is the thing that catches people. When you close the interior shut-off valve, there's still a section of pipe full of water between that valve and the spout outside — and that section runs straight through your rim joist and exterior wall, which is the coldest place in the building envelope. Water expands when it freezes, the section is sealed at both ends, and something has to give.
That's what the little brass cap on the side of the interior valve is for. Close the valve, open the outdoor tap so air can get in, then open the bleeder and let the trapped water dribble out. Two minutes. Then leave the outdoor tap open all winter.
I can't find the bleeder valve. What am I looking for?
Look at the pipe feeding the outdoor tap from the inside — usually in the basement joist bay directly behind where the tap comes through the wall. You want a shut-off valve on that line, and on the side of its body there'll be a small brass cap, a thumbscrew, or a tiny nut about the size of a pencil eraser. That's the bleeder. Put a cup under it before you loosen it.
If there's a valve but no bleeder, close the valve, open the tap outside and undo the union or a fitting downstream of the valve to let the water out — or get a bleeder-type valve fitted, it's a small job. If there's no interior valve at all, which happens in some houses, you genuinely can't winterize that tap safely and it's worth having one put in before the fall.
I have a frost-free tap. Can I just leave the hose on?
No — this is the most common way a frost-free tap ends up bursting. The whole design depends on the water in that long stem draining out through the spout by gravity once you shut it off. A hose on the end blocks the drain path, the stem stays full, and it freezes inside your wall exactly like a regular tap would.
Hose off in the fall, every year, including the Y-splitter and the timer if you use one. The City lists disconnecting garden hoses right alongside keeping the house at a minimum of 15 °C in its frozen pipe advice. Ten seconds of work to avoid a repair inside a finished wall.
When should I do this? It's still warm out.
Early October. Calgary hands out hard overnight freezes while the afternoons are still shirt-sleeve weather, and that first freeze is plenty to split a pipe sitting in an exterior wall — the wall cavity gets colder than the air does. Waiting for it to feel like winter is how people end up doing this in a toque in mid-November, or not at all.
Easiest way to remember it: the day you drain the hose and hang it in the garage is the day you do the tap. Hose off, interior valve closed, tap open, bleeder open. Do both taps — it's always the side or back one that gets forgotten.
I turned the tap on in the spring and water poured into the basement. What happened?
The pipe split back in January and you're only finding out now. It's the classic Calgary sequence: the section between the interior valve and the spout freezes and cracks, but nothing leaks because the interior valve is shut and everything behind the crack is dry. Open that valve in May and the water finds the split immediately.
Shut the interior valve off again straight away and dry things out. Then it's a repair conversation, and the honest answer on cost depends on access — a split you can see from an unfinished basement ceiling is a much smaller job than one behind finished drywall or above a soffit. Take photos before anything gets opened up, in case it turns into an insurance discussion.
Is a dripping outdoor tap actually worth fixing, or can it wait?
Fix it, but it's usually small. A drip from the spout when the tap is closed is normally a worn washer or seat — a stem repair, not a replacement. Water weeping around the handle while it's running is the packing, which often just needs tightening. Neither of those is a call-someone-tonight job.
What you shouldn't leave is a drip going into the winter, because that's water sitting in a spot that's about to freeze, and it's water you're paying for on a metered bill. The one that genuinely needs attention now is water appearing inside when the tap is on — that's a split line, not a washer, and it's doing damage you can't see.